SUMMER CLIENT PROJECT -
RAREBREED PACKAGING
PROJECT OVERVIEW
Rarebreed is a two man print and packaging company who produce structural packaging for various products of big named brands. Rarebreed kindly agreed to a remote client project that involved following one of their old project briefs. This was refined to accommodate a shorter time span and to remove any information that would cause a breach in privacy.
The challenge Rarebreed set was to design and mock-up packaging net concepts for three cosmetic products. The aim was to ensure these would be made from environmentally friendly materials and be designed stand out from current market competitors. It also would need to appeal a target audience through an eye-catching net design, but equally be practical and easy to pack as a mass-market product.
This project began towards the end of July and lasted for six weeks, structured into four design phases. These phases combined market and material research, sketching and prototyping net concepts, and presentation in CAD (scamps) for client submission. Despite being client lead, the level of detail in the work was set by myself and I also regulated the client communication via email and video call.
Overall, the whole project combined my avid love of market research and exploratory development through sketches and practical exercises, within my design specialism. I now understand how important 2D CAD is in the packaging industry and that it is a key tool in the progress of designing complicated nets.
The environmental aspect of the brief, apart from the structural packaging design, also piqued my interest before taking the project on. This has furthered my aspirations to work in the conceptual and creative side of the packaging industry. In the future, I hope to work with a company or start my own scheme that develops innovative solutions to design packaging that is kind to the planet and pleases the consumer market.
The layout for this project is like my experience with KCC packaging. The six weeks will be laid out in a blog style format, presenting the visuals of the work produced, and a verbal summary of the learning and challenges of each day. I also created a weekly Gantt chart to illustrate my work structure and overall progress to reflect on at the end of the project.
References for the information and images that are not of my own design are listed below.
PLACEMENT PREPARATION RESEARCH (03/07/2021)
Before starting the project, I carried out a series of tasks to be best prepared for any potential knowledge or skills required in the expected work. This included research into the basic principles and design theory of structural packaging design, along with exploration into key design terms used in the packaging world. These were mentioned by the client (Rarebreed team) during our first zoom meeting, and so this research gave me a chance to expand my knowledge on more than just CAD in the packaging industry.
The main knowledge gained from this exploration was the structure of the packaging design process. This design journey is conveyed in the visual below and is similar to the design phases I followed during this client project. The first part is market research and design inspiration, then net experimentation and development, and finally visual design through surface graphics.
Another aspect I learnt about was the five key principles you should consider in packaging. These were shelf visibility, differentiation, versioning, reassurance, and product delivery, and all represent how the physical attributes of packaging are equally, if not more important than visual appearance. This is especially true in being visible to the customer by standing out against the shelf competition, along with making them feel like they need to purchase the product (just by the shape).
I also took pictures of the cosmetic items I was designing the packaging for, these were a powder brush, eyelash curlers and nail clippers. These images, accompanied by sketches with dimensions, would be handy later in the project but I still wanted to get a feel for each product to start my design thinking.
The other resource I prepared was a fully detailed and colour coded project timeline calendar. This laid out my entire schedule for the six weeks, covering the time for each task and daily reflection in my weekly blog. This was such a successful tool that it even benefitted the needs of the client, as I could also plan our meeting times for the end of each design phase in advance.
RAREBREED CLIENT PROJECT -
WEEK ONE
19/07/2021
The first day of the project marked the start of PHASE ONE, dedicated to primary research on the cosmetic product packaging market. This observation involved exploring the cosmetic products sold in various supermarkets - Tesco’s, Boots, Superdrug and Poundland.
By visiting a range of retailers, I captured a wide range of packaging designs, both ‘non-environmentally friendly’ and ‘environmentally friendly’. By identifying the packaging design of these products first-hand, I could adapt my favourite features into my own design ideas in PHASE 3 of the project.
THE RESEARCH METHOD
The method conducted for my primary research involved photographing the entire product display. I felt this represented the consumers perspective, from viewing all the options to investigating the item(s) that stand out the most.
These photographs are presented in the visuals below. It was interesting to look at all this evidence close together; this revealed some key consistencies of the products that caught my eye purely because of the interesting appearance of its carton.
KEY OBSERVATIONS
Across all the shops, the products that caught my attention consistently were housed in organically coloured and shaped packaging cartons. Interestingly, these were marketed as the ‘eco-friendly’ options, made from sustainable materials, or housed in ‘eco-friendly’/sustainable packaging. These products had a series of common packaging design features;
ECO-PRODUCT PACKAGING
- White, green, and brown branding/soft colour scheme.
- Brand names that involved phrases like ‘eco’.
- Cartons with curved edges, clear product windows, full product coverage.
- Cartons made from card/paper-based materials printed with soy ink (FSC).
- The eco-brands mainly sold cosmetic brushes, there were no ‘environmentally-friendly’ packaged nail clippers or eyelash curlers.
- The pricing was higher than most items, evidently due to their sustainable attributes.
Even without a flashy point of sale, my eyes naturally drifted to these ‘eco-products’, despite the limited number of these items in comparison to the influx of ‘regular products’. These conventional products weren’t marketed as eco-friendly and consisted of mostly plastic based packaging. These also had a series of common packaging design features;
CONVENTIONAL PRODUCT PACKAGING
- Pink, purple, orange, branding/bright colour scheme, with metallic foil details (product info also on card/paper insert).
- Transparent cartons with sharp/clean edges typically made from PET/virgin plastics or plastic film (PVC etc.).
- At a quick glance these products were in mostly non-recyclable packaging.
- A wider variety of cosmetic products were sold in this kind of packaging, including the powder brush, nail clippers, and eyelash curlers.
- The pricing for these tended to vary on the brand, rather than the ‘sustainability' of its contents, ranging from low cost for own-brand products (£1.99) to a high cost (equal to ‘eco’ products) brand such as No7 (£9.00).
Overall, this was a practically engaging and fun task. When research involves physical interaction with a subject, I think the learning benefits are far greater than regular research via the internet alone. The only tricky part was finding a wide enough range of products to examine, the limited availability of eco-products meant I had to invest more time and money in the investigation.
20/07/2021
Following on from yesterday’s steady progress, I carried out a detailed analysis of a series products purchased from my market observation. This involved dissecting each product, in conventional (plastic) and eco-packaging, from the constructed carton shape to the flat lay of the net design.
This variety offered valuable insight into how the packaging is tailored to each product, some more successfully than others. The conventional packaging sampled served as an excellent reference for the design of a net and overall dimensions.
These features could be combined with the sustainable materials used by the eco-friendly products to create a potentially interesting packaging structure that would match the requirements of the brief perfectly. These primary findings were even more useful when combined with the secondary research in the next part of PHASE ONE.
THE ANALYSIS METHOD
I carried out my analysis by taking apart each product to identify the basic function and specification of the packaging. This included the structural design, such as the net shape (ergonomics), dimensions (anthropometrics), construction features and how it is integrated with the product. As well as the visual design of the packaging, the aesthetic of the graphics/branding and ease of use.
Just to note, a more detailed exploration about materials was carried out in the next phase of the project (PHASE TWO).
COMMERCIAL ANALYSIS -
'Environmentally Friendly & Sustainable Packaging'
PRODUCT ONE: Cosmetic Brush (So Eco)
Description
This sustainably marketed packaging holds a cruelty free and ethically made foundation makeup brush.
STRUCTURAL CONSIDERATIONS
Net Design
The net is structured in a pillow box design, with curved tabs (x3) that lock closed with friction, so no semi-permanent adhesive is required to seal the carton. These glues are often made of chemicals that would not support the environmental ethos of the brand. The net also has a product window on the front of the carton, so part of the product is visible to the consumer when inside. The euro slot is incorporated into the top part of the net.
Internal Product Housing
The product is held in an internal sleeve panel made of a sheet of card. This consists of two cut outs, formed by three score marks in the centre of the panel, to hold the product in place. This is an innovative way to keep an item secure without using plastic zip ties or flexible wire ties, these non-permanent fixtures would also be deemed ‘environmentally friendly’.
Packaging Ergonomics & Functionality
The carton is very lightweight and pleasant to hold in the hand. All the edges are organically rounded and means there is no risk of discomfort when interacting with the packaging. This design is also simple to disassemble, ready for disposal via recycling or composting.
The action of opening the carton is easy with no glue or plastic sticker to remove. The soft card material makes the oval tabs flip open and close without much effort, with no risk of your fingers getting caught inside the opening. The internal product sleeve also fits well in the hand, with adequate ‘wiggle room’ on each side of the ‘cut-out’ sections to slide out the product without a struggle.
Packaging Materials
The base of the packaging is made from mixed-recycled paper (FSC approved). The product window is made from corn-starch and is a biodegradable alternative to the plastic normally used for this feature. The ink used to print the information and branding onto the packaging is made from soy, which is how all the components are 100% biodegradable.
Net Specifications
AESTHETIC & VISUAL CONSIDERATIONS
Graphics & Colour Scheme
The general theme for this packaging is a white background with green accents (illustrations of bamboo). This matches perfectly with the ethical and environmentally friendly message the brand is trying to convey to the consumer.
Branding & Usability
All the user and product information is clearly laid out on the carton, especially the all-important ‘eco’ branding and explanation of how the product is made and can be disposed of.
POSITIVE & NEGATIVE DESIGN FEATURES
Positive
- Lightweight materials.
- Product is clearly visible.
- Pleasant to hold/interact with (no sharp edges).
- Simple net design.
- Easy to disassemble.
- All components are environmentally friendly.
Negative
- Soft card crumples and weakens after being handled a few times.
- Product holding panels could be incorporated into the base of the original net, minimising material/resource usage.
PRODUCT TWO: Makeup Sponge (Ecotools)
Description
This product consists of a biodegradable make-up sponge, housed in sustainably marketed packaging.
STRUCTURAL CONSIDERATIONS
Net Design
The packaging is made up of a simple net that forms a rectangular shaped carton (euro slot positioned inside base panel). The front face of the net has a window cut out to reveal part of the product, which sticks out slightly, held in by a clear plastic housing.
The tabs on the top of the carton are rather complex but allow for a friction fit of the smaller opening tab (no fixture required). This choice of tab, like the So Eco packaging, is to avoid the application of any environmentally harmful semi-permanent fixtures like glue. The base tabs are structured as an envelope lock, which is a simple and cost-effective way of keeping the bottom of a box securely closed, but easily disassembled for flat packing.
Internal Product Housing
The product is held in by a clear thin plastic mold. This plastic housing has a lot of surface area, making it easy to open and remove the product. It also sits on top of a platform made from a thin strip of card, held together with a slit-lock tab.
Packaging Ergonomics & Functionality
The carton is slightly bulky, but still light to hold and grip in the fingers. The squared and angular edges create the potential for discomfort when the user is interacting with the carton. The combination of the carton's rigid material and small size of the opening tab made the box initially hard to open. The design of the net made it quick to disassemble, despite the strong friction between the tabs.
Packaging Materials
The main material of the packaging is a FSC approved paper and card mix, with soy ink used to print the branding and graphics. This combination, like Product One, is what makes it ‘plant-able packaging’.
Net Specifications
AESTHETIC & VISUAL CONSIDERATIONS
Graphics & Colour Scheme
The general theme for this packaging was a combination of a muted yellow and white background, with purple from the colour of the product. These contrasted well together and made it stand out in the shop environment, which was shown in my market analysis images.
Although, this colour combination perhaps does not match the environmental and marketing focus of the brand and could even better suit the appearance for food packaging.
Branding & Usability
Despite the confusing colour scheme, the branding and user information is displayed brilliantly across the carton. There is a clear verbal and visual indication of how the consumer can help the environment by planting the packaging and the product after use in their own gardens.
The only important component missing is the identification of the material and disposal method of the plastic housing. This is not labelled or even mentioned within the product information and could risk the single-use plastic being thrown away incorrectly!
POSITIVE & NEGATIVE DESIGN FEATURES
Positive
- Both the product and packaging match the environmentally friendly aim of the project brief (apart from housing).
- Planting the packaging encourages a circular economy and sustainable use of resources.
Negative
- The colour scheme looks mismatched with the more ‘green’ and sustainable ethos of the product being sold.
- The carton was taxing to open; too much friction between the tabs and these needed additional surface area to help with grip.
- The single-use plastic housing was not mentioned on the carton, so the correct waste disposal method is unknown.
COMMERCIAL ANALYSIS -
'Conventional & Single Use Packaging'
PRODUCT THREE: Nail Clippers (Superdrug)
Description
A single rose gold nail clipper held in a transparent plastic carton.
STRUCTURAL CONSIDERATIONS
Net Design
This net is structured into a simple rectangular box with friction fit tabs at the top and bottom of the carton. The tight nature of these kinds of tabs means there is normally no need for additional sealing features, but this net had a circular plastic sticker to help keep the weighty product from sliding out. The euro slot, like the other cosmetic products so far, was added into the top of the carton on an extended panel.
Product Housing & Insert
The nail clippers were held in a thin panel with ‘cut-outs’ to slot it into place. This is the same housing used in the make-up brush packaging. The product information also slides out with the housing as a piece of card that is separate from the rest of the packaging.
Packaging Ergonomics & Functionality
The weight of the nail clippers made the carton very heavy, and even when held in place, the product still rattled around inside. The plastic material was rigid, but very flexible at the fold lines of the net. The sides corners of all the packaging components were slightly sharper than they appeared when gripped at the edges.
After several uses, the tabs had the tendency to push in on themselves when an attempt was made to open them outward. The shiny nature of the material also made them hard to grip and doubled the difficulty of opening the carton. On the other hand, these same characteristics made the product and insert slide out perfectly into the hand.
Packaging Materials
The type of plastic used for the packaging was not labelled on the carton, but I suspect, having seen packaging made of a similar material, that this is a form of PET. This single-use plastic was also used for the product housing. The insert was made of a shiny card, which like the other components is recyclable, but these resources could be saved in the first place if made from more sustainable/regenerative alternatives.
Net Specifications
AESTHETIC & VISUAL CONSIDERATIONS
Graphics & Colour Scheme
There was minimal imagery and colours used in this product, only a hint of pastel pink on the insert, and black and white accents on the front panel.
Branding & Usability
There was simple branding and typography to match the rest of Superdrug’s cosmetic products. This was also similar for the product information, which the simple layout worked better and clearly listed everything the user needs to know (apart from the name of the material).
POSITIVE & NEGATIVE DESIGN FEATURES
Positive
- Strong carton and net design, great for the weight of the product.
- Clear user instructions of the product function and disposal.
- Internal housing held product in securely.
Negative
- The heated seal on the glue tab meant the net was a struggle to disassemble.
- All the components, apart from insert, are made from single use plastic.
- Potential user discomfort from sharp edges.
PRODUCT FOUR: Eyelash Curler (Superdrug)
Description
A single eyelash curler tool held in a sealed film bag.
STRUCTURAL CONSIDERATIONS
Net Design
The packaging for this product was a simple square shaped plastic film bag. The euro slot was positioned at the top of the bag and was sealed at the bottom. The orientation of the product and tight nature of the film meant that there was minimal space for it to move around.
Internal Housing & Additional Parts
The rubber components for the eyelash curlers were housed in another plastic film bag and was left suspended inside the outer film packaging.
Packaging Ergonomics & Functionality
The flexible and slippery nature of the outer film meant it could be easily compressed and gripped in hand. Although, without an ‘easy tear’ opening line at the top, the film bag was impossible to open without scissors or another sharp tool. The product information was also printed onto the film on the back of the packaging, but its crumpled surface made this hard to read in some areas without laying the bag out flat.
Packaging Materials
The name of the packaging film material was not mentioned in the product information. I believe this to be a form of PVC, which is unfortunately not recyclable.
Net Specifications
AESTHETIC & VISUAL CONSIDERATIONS
Graphics & Colour Scheme
The monochromatic colour scheme and illustration decals were simple and consistent with the other Superdrug products. This is typical in their budget range of cosmetic products.
Branding & Usability
The detail and clarity of the product/user information on the packaging was very good, apart from neglecting the name of the plastic film material.
POSITIVE & NEGATIVE DESIGN FEATURES
Positive
- The tightly sealed film kept the product in place, despite not having internal housing.
- Clear user instructions and product information.
Negative
- The film is a non-recyclable material.
- This film is also a form of single-use plastics.
- The packaging can’t be opened without a sharp tool.
- The film cheapens the look of the product.
Despite the intensity and long time required for this analysis task, I still really enjoyed the extent to which I could examine these products.
I felt my research covered every possible criteria that would be considered in the design of packaging, plus it also meant I collected and learnt factually correct evidence that could be utilised in my future packaging work.
21/07/2021
The main task on this day was to explore cosmetic packaging via secondary research. This information not only served as further inspiration on top of the primary research but also provided context on the current cosmetics market and helped to establish the project target audience.
TRENDS IN COSMETIC PACKAGING DESIGN
The first area explored was the common practice of packaging in the cosmetic industry. This process commonly follows a set formula of an outer, inner and product packaging. For the purposes of this project, my focus was on the design of the inner packaging, with some consideration of how it will be transported in large quantities.
Despite the creative freedom of the visual design, the shape and functionality of the inner packaging needs to be highly considered. This is so it is appropriate for the purposes of equally holding a product and appealing to the target audience. Based on these parameters, it also important to choose the correct type of packaging. The most popular examples being;
- Boxes.
- Bags.
- Sleeves.
- Self-hanging attachments.
The type of packaging, combined with graphics is what can make the difference to the visibility of a product amongst the other competitors on the shelf. There is limited time for a product to grab the customers attention as they glance at a display and is why the purpose of the product needs to be obvious just by the packaging alone.
POPULAR COSMETIC PRODUCTS & PACKAGING
A few examples of brands (eco/non-eco) that are successful and are sought after because of their packaging can be seen in the mood board below. I have personal experience of the packaging of these brands and have also witnessed people seeking out products from brands, such as Glossier, because of how well designed their packaging is. A few popular names include;
- Glossier.
- Milk Make-Up.
- So Eco.
- Burt's Bees.
- Neals Yard Remedies.
- e.l.f.
- Lime Crime.
- The Body Shop.
COMMON DESIGN FEATURES
The mood board above also represents a wide range of common design features present in these popular brands. Despite having yet to explore ‘eco’ packaging in greater detail, after looking at the general trends across the industry, I formulated a list of these features;
- The product packaging is shaped to match the theme/name of the brand.
- Narrative of the product is clear at first glance.
- Card and cardboard used as a full or partial housing for the product.
- Products are visible from inside packaging due to a cut out/window.
- The product housing is incorporated into inner packaging.
- Maximum of two different materials included in packaging.
These features are also visualised in the sketches below.
TARGET AUDIENCE & BRAND IDENTITY
Based on the requirements of my design brief, my target audience would mostly be consumers who prefer cosmetic brands that market and follow a more ‘environmentally friendly’ message. They could already be living a more conscious lifestyle or are individuals who generally want to minimise their waste production and feel good about helping the planet.
I also wanted to give my project a fictional brand identity to help design an outcome that would appeal to these consumers. This would be an ‘eco-conscious’ brand that wants to eliminate packaging waste by promoting a cleaner way to consume beauty products, via the use of sustainable/responsibly sourced materials. This also would make the target market feel ‘good’ about purchasing the products to eventually become loyal with the ‘brand’, all from the design of the packaging.
The client persona's I created (see above) were really beneficial for visualising this target audience and project 'brand', I could imagine how they would want the packaging to look and represent based on their 'personal preferences'.
'ECO-PACKAGING & SUSTAINABILITY IN THE COSMETICS INDUSTRY
Packaging is classed as ‘sustainable’ when it has less environmental impact than conventional packaging. This effect on the environment can be minimised through conscious choices of materials to how the packaging can be reused and recycled at the end of life (regenerative).
Currently, the cosmetics industry is responsible for creating 120 billion units of packaging waste a year, 95% of which is thrown away after just one use! (Prabhakar, 2020, [online]). Therefore, sustainability should be and is slowly becoming more of a priority for producers, especially in tackling single-use packaging.
On a positive note, the cosmetic giant e.l.f has eliminated an estimated 650,000 pounds of packaging material since 2019, by simply removing secondary cartons, card inserts, and changing the design of secondary packaging (Business Wire, Inc., 2020, [online]).
'ECO' DESIGN FEATURES IN COSMETIC PACKAGING
As the main drive behind the project is about packaging being more ‘environmentally friendly’, I also wanted to explore eco-packaging in more detail. There are several environmentally conscious design changes cosmetic brands are already making to minimise the waste their products/packaging produce, whilst increasing the ease of reusability and recyclability for consumers. A few of which I have already encountered during my primary research. The current design features in the eco-cosmetic market are;
Refillable Bottles/Reusable Containers
To reduce disposal of bottles and encourage consumers to think about giving something new life, instead of throwing it away.
Solid Soaps/Shampoo Bars
Remove the need for (liquids) plastic bottles for shower gel, shampoo, and soap etc. by molding it into a bar.
Soy Ink
A printable ink made of soybeans, that when applied to card/paper packaging makes the net easier to recycle and less harmful to the environment compared to regular chemical inks.
This research task was less taxing than the primary research, as I did not have to engage in any practical tasks and could access all the resources via the internet. However, this did make the whole exercise long winded, despite my enjoyment of learning new things.
To counteract this, apart from the purpose of visual inspiration, I created a series of mood boards and took notes to keep me on track. The combination of visual and verbal learning is the most beneficial for myself, and for others who will I share this project with.
22/07/2021
Today’s task marked the conclusion of my research by presenting the recurring design features found in my primary and secondary research in the table below. This was a helpful resource, along with the visuals from my mood boards, for the first packaging design ideas in the project. The coloured sections represented the reoccurring features in both sets of research data.
23/07/2021
On the final day of PHASE ONE, I collated this week’s work into a presentation report, as requested by the client. This was rather challenging due to the influx of information collected and that I wanted to share, as I rather enjoyed the stimulation of doing primary and secondary research.
However, learning from a previous presentation task during my KCC Packaging internship, I remembered a handy technique of sketching out the initial slide order on paper. This helped to cut out any irrelevant information not required in a presentation, such as too many statistics or unclear images.
Just to note, the size of the document was condensed for the purposes of publishing it online, if you wish to see the full quality version, please contact me for the original document (all references for information/images located at the end of this section).
WEEK ONE REFLECTION
This week has been highly eventful and full of new learning, from exploring an entirely new area of the packaging industry, to developing an initial list of design pointers to apply to my own design thinking. There was minimal challenges, apart from laying out all my research into the PHASE ONE client presentation.
This required a lot of time to condense my findings and with additional imagery, ready for feedback to progress to the next phase of the project. I also created a series of initial sketches, inspired by all the information and visual references I had absorbed during the first leg of the project.
WEEK TWO
26/07/2021
The first day of week two and the start of PHASE TWO (packaging materials research) began with a video call with the project clients. This call was to show my progress so far in the project via a presentation report on PHASE ONE (market research). The document was a great way to illustrate my design thinking and creativity to the clients and posed as a reference for helpful feedback on their thoughts on the direction the project needed to go next.
This included the consideration of packaging design outside the cosmetics market, as this could offer further inspiration and knowledge that could be applied later in the project. The other task I carried out on this day was creating a series of sketches inspired by all the information and ideas collected during week one.
These consisted of a packaging concept idea, without mention of materials, for each cosmetic accessory. Although initial sketches, I thought that these ideas were quite innovative and tapped into the ‘eco’ theme of the brief and incorporated interesting design features. At this point, the structure of the net was not considered, these sketches were to experiment with the physical shape, ergonomics, and functionality of the packaging.
The first idea was inspired by the profile of a leaf and experimented with how a 3D object could be incorporated into such an unusual shape.
The second idea followed a similar design inspiration, the fully constructed carton would appear to look like a tulip flower, with the product as the 'stem' of the plant.
The third idea was a bit more adventurous with a tree trunk and leaf details throughout the structure of the design.
The chance to pick up my pencil and create some visual packaging ideas was very fun, but the most beneficial part of this day was talking to the clients during our video call. This feedback included some helpful corrections and advice about packaging, such as terminology for the parts of cartons and the industrial adhesives used to glue nets together.
27/07/2021
The main task on this day was conducting primary research on packaging materials. This covered the popular material choices in the cosmetics market, where I took a closer look at common packaging materials to understand why they were chosen for a particular product. For my own design outcomes, I eventually established more environmentally-friendly choices for materials, in line with the design brief.
However, in design, it is also key to consider all avenues that could offer valuable insights, despite the potential ‘negatives’ of a certain material (e.g., plastics). Therefore, until my secondary research when I discovered the specifics on packaging materials, I did not discount any single-use or unrecyclable materials during my observation.
I also recorded how products from other market sectors were packaged, particularly if similarly sized the project accessories. This included confectionery, stationary, and cooking utensils. This attention to detail furthered my commercial scope on the trends in packaging materials and inspiration for the structural design of packaging.
RESEARCH METHOD
The nature of the subject meant I could efficiently gather information without purchasing any products. Any physical references were sourced from the items brought during PHASE ONE. My research method consisted of recording the front and back of a series of products, with focus on the disposal information. This combined with my limited knowledge of packaging materials was enough to help me identify most the packaging materials encountered.
The retailers covered were - WHSmith’s, Boots, Superdrug, M&S, Tkmaxx, Paperchase, and Robert Dyas. This diversity of shop environments also revealed a clear pattern in the common types of packaging materials used in the general market.
KEY OBSERVATION & POINTS OF INTEREST -
'General Product Market Packaging Materials'
- The most common material composition was plastic and card, in the form of a blister pack, transparent container or plastic wallet with a card/paper insert etc.
- The most frequent plastic types were, PET (Polyethylene terephthalate), RPET, PVC (Polyvinyl chloride), and PE (polyethylene film).
- The consistent card and board types were - coated grey board, PAPERBOARD - bleached, non-bleached & recycled - all of which were made from recycled material paper (FSC).
- Plastic film was mostly in the form of a semi-transparent bag or strip and housed smaller and lighter products.
-The heavier, bulkier, and ‘awkwardly’ shaped products, e.g., knives, scissors, hooks, can openers, batteries etc., were held in a blister pack or form of plastic and card.
- Cardboard, such as grey board, was used as a full or partial carton for a variation of products - a pair of tights, a hairbrush, dental brushes, wash cloths, chocolates etc.
- This material sometimes had additional components of the same/different materials to accompany the shape or weight of the product (e.g., plastic/wire ties, paper straps).
- Almost every product I picked with paper/card material had at least 1-2 symbols, the most common being two arrows pointing towards each other in a circle.
- Other common symbols;
KEY OBSERVATION & POINTS OF INTEREST -
'Cosmetic Product Market Packaging Materials'
- As discovered in my PHASE ONE primary research and analysis, most cosmetic products were held in packaging that was made from/partly included a transparent plastic material.
- The common plastics included PVC, PE, and PET, in the form of rectangular cartons, trays, film bags etc.
- Solid plastics housed the heavier and bulky products, such as nail clippers, or sets of tools.
- Whilst lighter products such as nail files, lip balms, and other smaller tools were held in singular card panels or film bags.
-The cosmetic brushes tended to be the only products in a form of coated card housing and plastic product window.
- This card/board (paperboard) was made from recycled or responsibly sourced paper (FSC).
- The eco-products were mainly packaged in recyclable/biodegradable card materials, but also included alternatives in other components, like corn starch instead of PVC for a product window and soy for the printing ink.
KEY OBSERVATION & POINTS OF INTEREST -
'General Market Packaging Design Features'
- Half of the body of heavier products such as scissors or kitchen tools, were packaged onto a card panel with supporting fixtures (sometimes self-hanging on the shelf).
- Lighter products were held in by simple tabs that folded out to form a ‘shelf’ the item could slide into, without additional fixtures (e.g., a glue stick).
- Other products were incorporated into the back panel of the hanging component, either half or completely concealed (e.g., a toothbrush, lip balm).
- Parts of a product that were sharp or would need to be kept clean, e.g., the blade of a knife or scissors, were concealed by a plastic/card cover.
RESEARCH OBSERVATION & ANALYSIS VERDICT
A combination/variations of plastic and card, in forms such as ‘Blister Packs’, were the most common packaging materials used across the cosmetics and general product market. I believe these materials are the most popular because of the effectiveness of their collective properties in housing a product and making it look attractive to the consumer;
- These materials can keep heavy/bulky/awkwardly shaped products secure in packaging (prevent damage/theft etc.).
- A product/product feature can be concealed by a plastic/card ‘hood’ incorporated into the packaging to cover for consumer safety or hygiene.
- Both materials can be sourced in recycled versions and be recycled at the end of life.
- Best for product visibility: clear presentation of product purpose and brand.
I really enjoyed the opportunity to carry out further primary research for this project, this task was highly engaging and fun. The sheer range of products I came across showed some clear patterns in everything from the packaging shapes to the size of cartons within the general and cosmetics market.
28/07/2021
Continuing from yesterday’s primary research task, I carried out an additional analysis of the two products that met the successful packaging design criteria concluded in week one. Below are the best two examples that I thought represented how to effectively use materials for the appropriate design and suitability of a product.
COSMETIC PRODUCT: Body Massage Tool (Natural Chic, Tkmaxx)
Material type(s)
The packaging consists of a rectangular sheet of brown CARD, with clear PLASTIC zip-tie fixtures.
Product suitability/security
The product is held onto the base of packaging via two plastic zip-ties.
Positive & Negative Characteristics
Positive
- The product appears to be securely held onto the card.
- With minimal plastic components and the only other part being a small sheet of card, this product is better for the environment through having limited and easily disposed materials.
Negative
- The size and weight of the product would be more suited to a stronger and higher quality card for the packaging, in combination with the existing plastic fixtures.
- In transit the product’s security could be compromised by the flimsy nature of the card panel.
GENERAL MAREKT: Ergonomic Scissors (Maped, WHSmith’s)
Material type(s)
The packaging consists of a thick-coated PAPERBOARD base, with a clear PLASTIC (PET) formed cover and PLASTIC zip-tie fixtures.
Product suitability/security
The product is efficiently secured to the packaging via three sources, the scissor handles are attached via two plastic zip-ties and the blades are protected by an open-ended clear plastic formed cover.
Positive & Negative Characteristics
Positive
- The product is clearly presented and visible (first pair of scissors to catch my eye).
- The security for the product is good, with the paperboard packaging being too thick to tear easily.
- The product’s blades are well protected and kept safely away from your hands.
Negative
- The amount of plastic in this product could outweigh the recyclability of the paperboard.
- The distance the product hangs from the bottom of the packaging leaves a lot of extra space at the top that could be cut down to save on materials.
The process and outcome from this primary research was not only an excellent source of creative ideas, but also enhanced my previous knowledge of packaging materials. I now understand how singular or multiple materials can be enhanced with design features and combined to best suit the specifications of a product.
The next step was to understand the fundamental make-up of materials used in the packaging industry. Along with the strengths and weaknesses of these materials, which would help in the decision on my own materials going forward into the design phase of the project. Understanding the various symbols seen during my primary research, like the ones pictured below, was another aspect that required further investigation.
The other task on this day was the first leg of the hefty secondary research into the materials used in the packaging industry. This investigation revealed the fundamentals of these materials, from the virgin form to the current environmentally-friendly materials/alternatives available in today’s market.
The most important area to understand was the characteristics of these materials, and therefore what uses/market sectors they would be best suited for. This enabled me to identify a series of appropriate materials for my own application, and even consider the potential costs and processes that would be required to produce it on an industrial scale.
SECONDARY RESEARCH -
'Common Industry Packaging Materials'
In the packaging industry there is a multitude of raw materials used for holding consumer products across numerous market sectors. Packaging materials can be categorised into ‘Primary’, ‘Secondary’, ‘Tertiary’, and ‘Ancillary’ packaging, and are dictated by the product sector. For example, primary packaging is used when the material has direct contact with the product, such as food, clothing, technology, and other retail products.
Common forms of primary materials include plastic containers, mono-cartons (card), bubble wrap and various plastic laminated/film pouches. Mono Cartons are used in retail because they are made from paperboard which can be easily printed and offer high protection from minor dropping/bumps etc. This along with ancillary packaging, adhesives, tapes, straps for packaging security, were the two most relevant forms of packaging for the project.
After understanding the classification of packaging materials and fixtures, my next investigation covered the top materials used in a commercial setting. These common packaging materials are - plastic, glass, paper/board, and metal. However, as the project was aimed at the creation of packaging concepts, I only recorded and analysed the materials that are already mass produced for cosmetic products - glass, paper, and plastic.
Despite metal and wood being unrelated to the direction of the project, I still enjoyed briefly learning about these materials and how they can be applied in packaging goods.
PLASTICS
DESCRIPTION
Plastic is the most common and hard to dispose of packaging material, coming in all forms from a solid pot to a flimsy transparent bag. The light nature of the material, low-costing and manufacturing versatility is why it is the packaging material of choice.
TYPES & USES
DISPOSAL/END OF LIFE (ENVIRONMENTAL FACTORS)
From production to end of life, plastics seem to only harm the environment in their existence. It is common knowledge the material in its virgin form is derived from a non-renewable resource know as fossil fuels, and therefore requires an extensive amount of energy to source and manufacture. Although plastic is highly recyclable, some forms of plastic such as PVC (film) cannot be recycled and so end up on landfill, or worse can pollute and degrade the environment.
Plastic may be deemed as the ‘enemy’ in the eyes of the consumer but can in fact be of some benefit to the environment. This is down to its extensive life span that enables plastic to be re-used multiple times and the light weight of plastic packaging requiring less fuel for transportation. This results in less greenhouse gases being emitted!
ADVANTAGES & DISADVANTAGES
Advantages
- Plastics are low cost.
- Plastics are highly beneficial for product visibility (design versatility).
- Plastics are lightweight and moldable.
- Plastics keep a product safe and secure.
- Plastics can be made into strong or flexible packaging.
- Plastics can be heat sealable.
Disadvantages
- Plastic is a non-degradable material due its strong molecular structure.
- Indecent disposal of plastics causes negative social and environmental impacts.
- Plastic materials have a short life span and degrade in quality overtime.
GLASS
DESCRIPTION
Glass, made from silicon-dioxide (sand), is considered a classic material in the food and beverage world. This is because it is an impermeable material that can preserve a product for an extended period.
TYPES & USES
DISPOSAL/END OF LIFE (ENVIRONMENTAL FACTORS)
The production, transportation, and disposal of glass (recycling) is a process that has been proven to cause more harm to the environment than plastic bottles. This is because glass takes more resources and energy to produce, plus the weight of the material requires more fuel and energy to transport.
On a positive note, recycling glass is still beneficial to some extent as it can be repurposed into further material. This regeneration, like plastic, prevents more virgin material being made and therefore preserves our earth's resources.
ADVANTAGES & DISADVANTAGES
Advantages
- Glass (Silica) can be moulded into different shapes.
- The transparency of glass makes products highly visible.
- Glass is a good preserving material.
- Glass is 100% recyclable.
Disadvantages
- The production, transportation and recycling of glass has a high carbon footprint.
- Glass production is expensive.
- Although chemically strong, glass can shatter easily.
PAPER & BOARD
DESCRIPTION
Paper and board, made from cellulose fibres or other sources (e.g., hemp), is considered the most basic material available in multiple varieties with different applications. The material is also becoming more popular being 100% biodegradable with the rise against virgin plastics.
TYPES & USES
DISPOSAL/END OF LIFE (ENVIRONMENTAL FACTORS)
Derived from 100% natural and biodegradable materials, paper and board is considered the most environmentally friendly and sustainable material in the industry. The regulation of trees to counteract deforestation and maintenance of our natural carbon sink can be supported by choosing packaging from sustainably sourced forests. Organisations such as the Forest Stewardship council (FSC) supervise and promote sustainable forest management on a global scale.
The replanting and regenerative management of this material counteracts and reduces the carbon footprint of board packaging production. However, it is argued that plastic is still the ‘best’ due to its light-weight, water resistance and ability of keeping products hygienic and secure, as well as producing less emissions than paper in its production and transportation.
ADVANTAGES & DISADVANTAGES
Advantages
- Virgin material for paper and board packaging is sourced from a natural and regenerative resource.
- Paper and board can be designed and manufactured into light, multi-usage, visible and highly durable packaging cartons.
- Paper and board is a low-cost material.
- Paper is easy to dispose of at the end of life - recycled into new material or a form of energy, or bio-degrade into a nutrient rich compound.
Disadvantages
- Paper has poor water resistance and will perish in moist conditions.
- Paper and board packaging often needs to be enhanced by another material for heavier or sharp products.
Today’s task enabled me to discover the foundation and commercial application of the numerous materials available in the packaging industry. I enjoyed learning about the benefits and drawbacks of these materials, and think that the pros and cons of plastic vs paper packaging are equally as beneficial for the environment and economic viability of the material.
However, it all boils down to the overall durability and reliability of a material, as this is what keeps a product secure and protected, whilst lasting beyond usage to be re-purposed or recycled. If a material can be reused, recycled, or composted, the life of the original resources is prolonged. Even though some materials have a higher carbon footprint during production or distribution, efforts to counteract these emissions via regenerative measures (e.g., reforestation) is more beneficial for the longevity of our resources in the long run.
29/07/2021
The task on this day was further exploration on packaging materials. Drawing on from yesterday’s topic of sustainability, I investigated the current development and benefits of more environmentally-friendly alternatives to existing materials.
SECONDARY RESEARCH -
'Environmentally-Friendly Packaging Materials & Industry Initiatives'
The continuous production of single-use and ‘throw-away’ packaging waste is still one of the main contributors to the degradation of our environment and ecosystems on a global scale. Therefore, being more earth conscious is now more important than ever for consumers and producers.
In the packaging world there are numerous alternatives to materials that are notorious for being ‘bad’ for the environment, such as non-recyclable plastics (e.g., PVC). The whole point of these alternatives is to be as economically beneficial through maintaining the packaging's functionality and security, whilst remaining ‘eco-friendly’ with the origins of the material or how it can be naturally disposed of.
This consideration of materials combined with a more circular approach to production, are the current trends in the packaging industry. ‘Loop’ is an industry initiative launched in 2019 that includes a host of large-scale companies, such as Haagen-Daz, Hellmann’s’, that developed a new packaging system of high-quality cartons that can be returned and refilled.
This touches on the 6 R’s in design and the idea that instead of throwing away perfectly usable packaging (containers/jars etc.), you instead give it new-life through another purpose to extend the life of the original virgin material and resources. Based on this trend, the popular materials in the eco-packaging world are recycled cardboard and paper, recycled plastics, bio-plastics, and mushroom, corn-starch, and seaweed packaging.
I selected three of these to analyse based on how they could benefit my own packaging designs in combination with other materials. The most important fact was to what extent a material met the ‘environmental’ criteria that often encourages consumers to purchase a product.
RECYCLED PAPER & BOARD
DESCRIPTION
Recycled paper and board has the same durability and sustainable qualities as regular paper and board, except this material is the recycled end-product.
TYPES & USES
DISPOSAL/END OF LIFE (ENVIRONMENTAL FACTORS)
Paper and cardboard are organic materials, yet if the virgin pulp is sourced from unsustainable forests with endangered species, consumption on a large scale can be extremely damaging to the environment.
It is considered best practice to source material from post-consumer or post-industrial recycled paper and cardboard, or as mentioned the general material research, from trees that are FSC-certified (sourced from sustainably managed forests).
ADVANTAGES & DISADVANTAGES
Advantages
- Paper and board sourced from recycled materials is even more environmentally friendly than the virgin material.
- Like regular paper and board, the recycled material can be designed and manufactured for multiple uses and product applications.
- The re-use of existing paper and board saves money, energy, and resources.
Disadvantages
- Although most paper and board in the waste system is recycled, material that is contaminated with food or is too small can be rejected at the point of recycling.
- Paper has poor water resistance and will perish in moist conditions.
- Paper and board packaging often requires enhancement with other materials for heavier or bladed products.
BIOPLASTICS
DESCRIPTION
Bioplastics are derived from plant or other natural/renewable materials instead of fossil fuels and means they can break down naturally. The material is formed by converting sugar from plants into polylactic acids (PLAs) or polyhydroxyalkanoates (PHAs).
TYPES & USES
DISPOSAL/END OF LIFE (ENVIRONMENTAL FACTORS)
Despite being more eco-friendly in some forms than traditional plastics, after looking at the life-cycle of bioplastics I discovered that this wasn’t the case. The production of starch-based bioplastics can cause high levels of pollution because of the fertilizers required to grow the crops.
So, it appears that common plastics and bioplastics are too close in their negative environmental impact to deduce whether one is better than the other.
ADVANTAGES & DISADVANTAGES
Advantages
- Bioplastics are made from raw plant materials instead of oil, which saves the earth's non-renewable resources.
- Bioplastics won’t leach toxic chemicals into their contents (BPA free).
Disadvantages
- Some forms of bioplastics are biodegradable and those that aren’t can be recycled.
- Bioplastics can only break down in certain conditions.
- The ‘natural’ origin of bioplastics can encourage people to litter.
- Bioplastics can still end up polluting the environment by blocking water streams.
RECYCLED PLASTICS
DESCRIPTION
At the end of life, plastics can be recycled into further plastic material and plastic products for packaging, bags, furniture and building materials etc.
TYPES & USES
DISPOSAL/END OF LIFE (ENVIRONMENTAL FACTORS)
The benefits of recycling plastics include the prevention of pollution and conservation of non-sustainable resources and energy. This is due to plastic taking up to one thousand years to biodegrade. However, not all types of plastic are recyclable (e.g., PVC films) which means the material still ends up on landfill and does impact the environment to some extent.
ADVANTAGES & DISADVANTAGES
Advantages
- Recycled plastic material can be repurposed for all manner of retail applications.
-Recycling plastic into new material saves the production of new virgin plastic, which saves the earth's non-sustainable resources.
- Recycled plastic packaging can be reused and recycled numerous times.
Disadvantages
- Not all forms of plastics are recyclable.
- Plastic material loses its quality after continuous recycling.
- The idea may give people the incentive to buy more plastic.
I had fun exploring the industry trends of environmental initiatives for retail packaging and the market of ‘sustainable' materials. I am now more knowledgeable on a subject that is a key factor in the entire discipline of design. Within reason, all the eco-materials I examined were equally as ‘environmentally-friendly’ as each other, especially if the life-cycle of each one is considered.
However, the materials that have the most ‘regenerative’ properties and encourage circularity are considerably better for the environment. This is key for long-term and will encourage sustainable consumption. To be in line with the project brief, I planned to include a series of environmentally-friendly materials with some biodegradable and organic characteristics.

26/07/2021
On the last day of week two I created a packaging material suitability table, influenced by the evidence I had discovered during the past few days. This consisted of a list of two-three ‘common’ and ‘environmentally-friendly’ materials to allow for a close comparison on the potential material combination, suitability for the product and the overall benefits and drawbacks.
Despite all materials having some disadvantages, I wanted to choose a selection that had more benefits than drawbacks, which helped to shape the ‘environmental’ focus of the project. The creation of this table concluded the main research for the project and would be a key reference throughout the ideation and prototyping process.
The image of the 'Material Suitability Table' above is just for visual reference, click the button below to see the full sized table and check out all of the details!
Overall, the research and analysis tasks from PHASE TWO completely altered my perspective on the complexities of choosing materials for product packaging. I now understand how examining the origins of a material can reveal its suitability for a product. The process was far from challenging and instead just required a considerable amount of time to explore all the pros and cons of each individual material.
WEEK TWO REFLECTION
The events of week two were highly enlightening, from examining the packaging industry on large scale to dissecting individual materials. I feel like this has enhanced my learning to an industry level, especially in learning about how plastics aren’t always the ‘bad material’ when sustainability is concerned.
WEEK THREE
02/08/2021
The main task on this day consisted of reflecting on the extensive material research from last week, where I finalised the chosen materials for the project based on the results of my material analysis table. Although I was not able to access these exact materials for the project, this industry insight showed me that it is still important to consider what would be used to house my products in the commercial market.
This analysis table covered everything on these materials, from the characteristics to the pros and cons for a thorough comparison. This helped to identify the ‘best’ material out of the two categories of paper and plastic, limited to avoid the excessive use of resources. These were also ranked on how well the material would suit an individual product, as some criteria would be relevant to one more than another, such as the tear resistance of select forms of card for the weighty nail clippers.
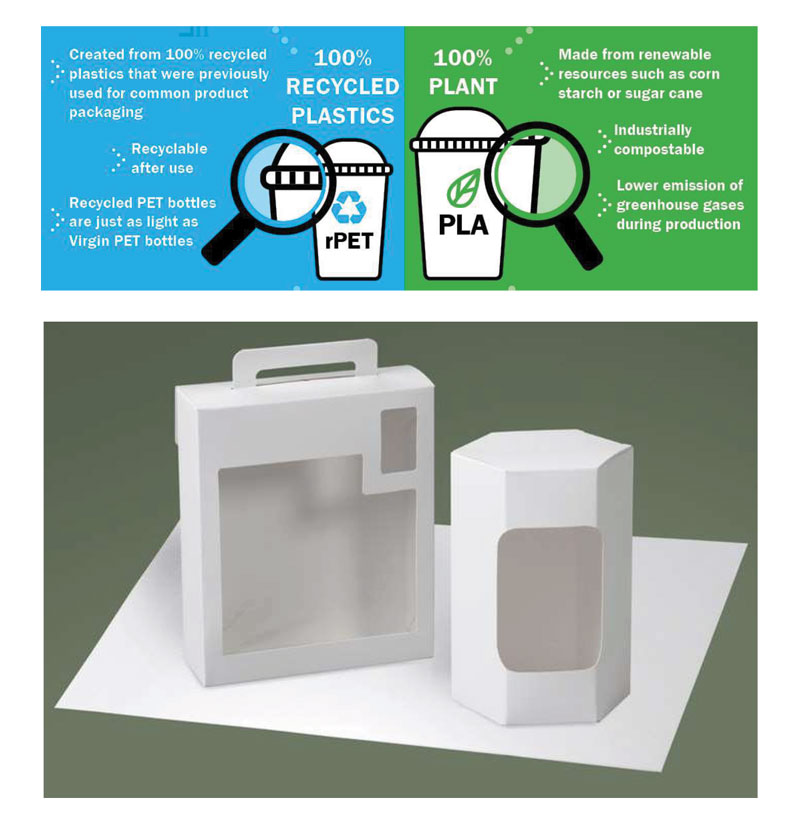
The final verdict from the ‘Paper & Board’ section was Coated Recycled Paperboard (CRB), whilst my decision for the type of ‘Plastic’ was still tied between Recycled Polyethylene Terephthalate (rPET) and PLA (cornstarch bioplastic). CRB was the clear winner due to its equal durability and bulge resistance, which would be handy for the complicated shape of the eyelash curler. The other bonuses of the material are that it is made from 100% recycled pulp which links to the ‘loop’, or ‘circular economy’ initiative being driven in the packaging industry.
CRB can also be sourced from certified organisations such as the FSC, who promote the sustainable use and regeneration of resources (trees) and so will stand out to the more eco-conscious consumer. This would especially appeal to the project target audience and design brief. CRB has all these benefits and is still low cost, and therefore would also be suitable for the other project accessories with some adaptation to the net to help keep the items in place.

This adaptation would be in the form of the second packaging material, a PLASTIC feature that will fulfil the purpose as a visibility window or to strengthen the structure and security of the net. My initial uncertainty between rPET and PLA was because of the equal strength and design-freedom of the materials (e.g., film/blister packs etc.), and how they are also the most commercially available alternatives to plastic.
rPET is more expensive than PLA to manufacture, but the ease of disposal in a market where single-use plastics are rife would outweigh this drawback. PLA’s biodegradable qualities benefit the environment even further, but this process can only occur in set conditions and facilities for home composting have yet to be normalised. Therefore, this availability of rPET from the start to the end of its life cycle is the appropriate choice as the secondary material of my concept designs.
This task enabled me to look back on all the information I had adsorbed so far in the project and pinpoint the key facts to help kick off the generation of my own packaging ideas. I also revisited and refined the ‘design feature table’ created in PHASE ONE, which consisted of criteria that was consistent in a successful packaging design (see above).
03/08/2021
The ideation stage of the project began with brief research for further creative inspiration, as in past projects this has proven to be highly valuable for developing more unique ideas. The best place to source this reference is from a relevant theory or subject, and in the case of this project, the emphasis on the environment throughout led me to the study of shapes in nature.
BIOMIMICRY IN DESIGN
Biomimicry is the design of materials, products, structures, and processes that are modelled from strategies found in nature. In design, biomimicry has inspired some of the most innovative and successful products, such as the bullet train’s unique nose design and a kingfisher’s beak. This living example of biomimicry is how I wanted to try and incorporate biophilic features within my packaging ideas.
The method for applying shape biomimicry into a design process is by observing shapes and patterns in nature that you could apply to a feature or an entire product. I had already attempted this without realising in my initial sketches, where I was inspired by natural forms (leaves, trees etc.) and felt that an interesting shape is more likely to grab the attention of consumers.
COMMERCIAL EXAMPLE OF BIOPHILIC PACKAGING DESIGN
During this research, I discovered some commercial concept references, including an example by Daniel Daquigan who designed packaging for single-rice servings that was inspired by the pattern of rice fields. It was interesting how the designer considered the external context of the product for creative license, such as where it is made, and the possible shapes or patterns associated with this.
I also recorded other product concept examples that were inspired by natural and organic forms in my mood board (see above), along with several objects and shapes that I was drawn to (e.g., the shape of a sunflower).
This research task was a fun opportunity to expand on my previous knowledge of biomimicry from secondary school. By understanding the basic definition of the subject, I now am more educated on how biomimicry is more complex than just looking at shells or honeycomb. The design of products that have inspired me in the past have been directly influenced by the biology of living things, this has encouraged me to look to nature as a reference for shape and form in more projects in the future.
04/08/2021
The other research I carried out this week was the ergonomic and anthropometric considerations in packaging design. This reference was important to make sure my own designs, although concepts, were still conforming to the criteria expected in a packaging net for it to be suitable to the user and function in the appropriate manner. I also believe that these design considerations are important to include across all disciplines of design.
For this project, I referenced the size and functionality of existing packaging from PHASE ONE, as these have already been designed to be suitable for human interaction. However, I still took the time to consider the ergonomic and user criteria expected in packaging-based applications.
ERGONOMICS, ANTHROPOMETRICS & PACKAGING DESIGN
Packaging that is ergonomic is designed to have the perfect combination of design features to allow for organic human interaction. The most important aspect of ergonomics is that it makes any carton easier, more comfortable, and clearer to understand and interact with. This ties into the subject of ‘anthropometrics’, the study and measurement of physical properties of the human body, such as its size, shape and strength.
This subject is key in developing an ergonomic design, as knowing a particular measurement on the human body (e.g., finger sizes) means a designer can better tailor their product for maximum user comfort and suitability. For the design of packaging, the main area of focus is the hands, mainly the sizing and capabilities, which makes up the principles of ergonomic packaging design.
The principles and benefits of ergonomic packaging are;
SAFTEY
Ergonomic packaging makes a carton safer to handle and interact with to access the contents inside. A blister pack is an example can be difficult to open and can cause injury due to sharp edges. Safety is also paramount for the product inside the packaging to keep it safe during transportation and general handling.
BUYER PERCEPTION
The design of packaging creates a perception of a brand and product to a customer, and can influence their spending decisions. This includes the shape of the packaging, the material choices and how approachable it is to open. This is seen in eco-packaging that is shaped organically to stand out and is made from eco-materials to save resources.
EASE OF USE
The most important aspect of ergonomic design is usability or ease of use. This simply provides the easiest and least complicated way of going through the motions of interacting with packaging. This covers the package size, weight, shape and how portable it is, with the aim of minimising any form of muscle/joint strain, fatigue, and injury.
For handheld packaging, the design of tabs and features that allow access inside the carton should provide at least 0.5 inches of surface area and be textured in some way. These overt clues make the process even easier for the consumer, such as ‘tear strips’ which can be integrated into most materials as a perforated opening.
VISUAL ERGONOMICS
The structural design of packaging may lay the foundations for the visual design, yet graphics and imagery etc., can still play a role in the ergonomics of a carton. This includes easy to read fonts, colours, graphics, and a flowing composition of information that displays the important safety and disposal details the consumer needs to know.
After gaining new inspiration from biophilic shape and common design theory, I applied this learning into the next task in the project. This was the development and finalisation of my packaging ideas, my approach to this was drawing out the ‘best’ idea and coming up with different packaging shapes for each accessory.
PACKAGING CONCEPT IDEATION & DEVELOPMENT SKETCHES
Accessory One: POWDERBRUSH
The first of my concept ideation and development sketches depicts packaging ideas for the powder brush accessory. All these ideas are slightly similar in how they are shaped like natural forms, as people are more likely to react to organic and interesting shapes. The ideas I liked the most were the ‘Leaf-Glove’ and ‘Leaf-Body’ concepts, these had the best balance between being visually attractive and functionally suitable for holding the powder brush.
Accessory Two: NAIL CLIPPERS
The play on natural shapes continued into the ideation sketches for the nail clippers. Once I had gotten into the flow of sketching, my ideas became more and more adventurous. The combination of plastic and card meant I could create all manner of shapes, such as a sunflower or a watermelon slice. The ideas that I believed to have the most potential to progress were the ‘Tulip-Shape’ and ‘Acorn Shape’ concepts.
Accessory Three: EYELASH CURLERS
The final product to generate ideas for was the eyelash curlers. This was a more challenging subject because of the multiple angled features on the accessory. The carton needed to either be wide with a flat face to completely cover the curlers or mimic the protruding angles by having a wider base. Based on these design criteria, the concepts that I liked the most and wanted to try were the ‘Tree Trunk Shape’ and ‘Leaf-Shape’ ideas.
The theory-based exploration carried out on this day is important pillar in any design process, especially when working towards concrete project ideas. Despite having some knowledge on ergonomics and anthropometrics prior to this project, this task revealed the specific features in packaging design that require extra attention to detail for the benefit of the user.
I believe that from viewing a product in a shop to accessing the product inside, this interaction with packaging should be natural and with minimal inconvenience.
05/08/2021
The ideation sketches from the previous day helped to reveal which of my packaging ideas were the strongest. From this, I selected two ideas with the most potential for each accessory and brought them to life in today’s task – the initial structural net design and prototype experimentation.
This involved the creation of a finalised visualisation sketch for each net experiment, with colour and annotation. These sketches also detailed the way each idea considered the basic design considerations, such as ergonomics, materials, durability etc., but more importantly why these features were important to the concept’s functionality.
These sketches were also used as visual reference for the initial net designs for each concept idea. This process was highly effective, as I it allowed me to create a basic outline of the packaging shape and then progress this into the beginnings of a functional net. At this stage I also had the freedom to make some errors with dimensions as these would be rectified later on in the project.
INITIAL NET SCAMP PROTOTYPES & PACKAGING STRUCTURE EXPLORATION
Accessory One: POWDER BRUSH
'LEAF-BODY CONCEPT
The first packaging idea I chose to develop into an initial prototype was called the ‘Leaf-Body’ concept. The basic structure of the ‘Leaf-Body’ was a leaf-shaped base, made from a high GSM paperboard, designed to fold and hold the product in place.
This idea also attempted to test the impact to product security when the amount of plastic is minimised and is instead mainly secured by card fixtures. The product would be held in by two perforated openings, positioned so that the brush is angled down and would cover the bristles with the bottom curve of the leaf. This part of the product is protected further by a plastic (rPET) shell, acting like a blister/vacuum pack which is easy to peel back and would keep the bristles hygienic.
Despite the top part of the net, near the euro slot, being doubled over to increase the structural strength of the main body, this may not be sufficient for a hanging product. The product and packaging security could be increased further with additional attachments on the brush handle, so it would stay inside the ‘leaf’.
This concept would need substantial adjustments to be suitable for a commercial setting. However, amongst these errors, there are some redeeming features that could be taken forward, such as the simplicity of the design with minimal parts and the textured surface the blister opening would have for easy access.
'LEAF-GLOVE CONCEPT'
The stronger concept idea for the powder brush packaging was the ‘Leaf-Glove’ concept. This design shows my experiment of combining a pillow-box and open-top style together to create a uniquely shaped carton. Although some adjustments would be required to rescale parts of the net to make them fit together correctly, it was still a successful idea.
The ‘Leaf-Glove’ perfectly conceals part of the product, with space to develop a protective shelf for the bristles, whilst keeping the product on show and clearly displayed. The illusion of the leaf shape is carried throughout the front of the carton, with the ‘stem’ functioning as the hanging feature. The pillow-box also offers an organic appearance, as well as being visually pleasant and comfortable to hold.
The improvements required for this concept include the extension of the main body height, to allow the brush to fit further inside. This would be extra support for the card strap holding the top of the brush, which could be changed to a stronger material made from factory off-cuts.
The internal separating shelf that keeps the bristles concealed also needs to be re-designed to fit better inside the carton. The product could also be accessed from the carton via a perforated opening feature.
Accessory Two: NAIL CLIPPERS
'FLOWER-GLOVE CONCEPT'
The ‘Flower-Glove’ packaging design is like the ‘Leaf-Glove’ concept, except the shape revealed in the constructed net is a flower. Part of the product is concealed inside the pillow-box feature but is equally visible through the window cut out on the front panel. This would be partly covered in a form of plastic (rPET) for product security and hygiene.
The curved silhouette of the carton is free from sharp edges and fits well into the hand. The product is attached to the carton at two points and due to its weight and bulkiness, these strap features would be made from recycled plastic (rPET). The product would be accessible via an easy-opening strip that's built into the back of the carton, this is designed to be an overt clue for interaction and would be pulled down to reveal the product inside.
This concept idea was a strong contender to progress further, but would also need some key design changes. These involve a more careful calculation of the position of the tabs and curved sections so all parts fold together correctly, this could be helped by increasing the scale of the overall net.
'ACORN CONCEPT'
This concept was a creative shape experiment that combined full-coverage packaging with an acorn silhouette. It consisted of two main parts of a top hanging feature that mimicked the shape of an ‘acorn', along with a base platform that would hold the product place in a perfectly sized slot.
In theory, this idea was an attempt to play into the nature and eco-theme of my project ‘brand’. Despite being an eye-catching shape, the complexity of the net would not be suitable for large scale production and easy construction on the commercial market. This idea is therefore is an unsuitable design candidate for the project.
The number of components would also be unviable for the circumstances proposed in the brief, as the curved top of the carton would require the euro slot to be made from another stronger plastic rather than a thick card to avoid it from bending out of shape.
Accessory Three: EYELASH CURLERS
'TREE-GLOVE CONCEPT'
This concept follows the same visual appearance and user-interaction features as my other ‘Flower-Glove’ and ‘Leaf-Glove’ packaging ideas. These all have a pillow-box shaped base that holds the product like a ‘glove’, with user-friendly curved edges, a perforated opening strip and a combination of thick paperboard and plastic for maximum security.
The slight difference with this design is the shape of the tree for the main body structure, and the different shape of the front panel to better support the protruding nature of the product. The chosen paperboard material (CRB) would be suitable for this, as it is susceptible to bulging, which would likely happen during the assembly and transportation of the product.
Despite needing several changes to implement this extra support and security into the design, there also needs to be a slight enlargement of the overall net to allow more room for a ‘separator shelf’ to hold the extra parts that come with the eyelash curlers. I attempted to mock-up a quick version of this just to establish the dimensions.
However, as with the other ‘Glove’ concepts, the fundamental parts of the idea can be improved to better strengthen the overall carton and would make them viable if designed for real life market products.
'LEAF-SHELL CONEPT'
The final experiment from my ideation sketches was called the ‘Leaf-Shell’. This idea consisted of a full-coverage carton in the shape of a leaf, structured with a base and side panels in card, and the front face made of a transparent material (rPET). These materials are often combined with similar products that are small but heavy with additional attachments to prevent any unnecessary movement inside the carton.
The attempt to incorporate a leaf into the design of a carton was an interesting choice but was unfortunately too complicated for me to structure into a bespoke net. This proves that it would be even more of a challenge to produce on an industrial and commercial scale. Also, saturation of plastic in direct view of the consumer, despite being recycled, may put off my ‘eco-savvy’ target audience.
Even though the initial structural experiments above required extensive improvements, this exercise was a challenging but engaging way of establishing the shape and suitability of my packaging ideas to the project accessories. I enjoyed the chance to embrace the practical side of a design project, from sketches to models, as a multidisciplinary task is far more beneficial than pure digital exploration.
06/08/2021
The final task of the week was to conclude on the results of my developed packaging ideas to start the next stage of the project. This experimentation and sketching was a fun start to the more practical side of the project, and I am now more aware of the technicalities of drawing out packaging nets and how the design of bespoke structures pose even more of a challenge.
Despite only a few of my packaging concepts having the potential to be taken forward for development and refinement, it was still fun to carry out a task where making mistakes is necessary to reveal the ‘successful’ attributes of a design idea.
The three chosen concept ideas were the ‘Leaf-Glove’, ‘Flower-Glove’, and ‘Tree-Glove’ designs. These all demonstrated enough design potential, with components that could be developed into an outcome that fulfils the design brief. This reference to the brief is also important, as at this stage I needed to reflect and highlight the key areas that I may have missed so far.
From this reflection, along with my chosen ideas and new knowledge from previous research, I would be ready to start developing these selected packaging ideas. I also considered the idea of creating two versions of a net for each product, one that would be more practical with less ‘bespoke’ features, and the other a bit more creative and potentially close to the line of being difficult to model.
WEEK THREE REFLECTION
This week consisted of a variety of tasks and practical activities. The prototyping process was particularly fun, despite the amount of time and perseverance required, as it allowed me to take risks via experimenting with ideas, with the chance of creating a new and bespoke net design.
Other memorable events this week was the application of design theory to creative thinking, after my discovery of the presence of nature in some of the most well-designed products of today. The only challenge was the initial unknown on the success of these concept ideas, it was a daunting and took substantial effort to produce an acceptable sample. However, without these mistakes I would not of had the clarity to identify the ideas with creative and functional potential.
WEEK FOUR
09/07/2021
Before starting the next part of PHASE TWO - the creation and refinement of prototype models - the first task of the week was to reflect on my progress so far in the project. This involved brainstorming how I could better apply the important criteria of the brief into these developed designs. This not only benefited the direction of the project in meeting the client requirements but also helped the progression of my own learning on packaging design to a professional level.
These key requirements of the brief were related functional and visual design features - the concepts must be of a ‘new/unique shape’, ‘suitable for a mass market product’, and be ‘easy to pack’. In other words, my designs needed to be different from other packaging on the market, in either its materials or carton shape, and this shape of the net should be simple enough to make it easy assemble.
The carton must also be durable enough to pass a packaging ‘Drop Test’ which is designed to determine how free-fall impacts features like the corners of a carton. At this point in the project, I had discovered a design feature on tabs (angled slits) which appears to keep them from ‘popping’ out of place when the carton is handled, but also have enough surface area to allow for easy user interaction. These features are photographed below on a commercially used box designed to hold test tubes.
After some quick research I also discovered a selection sustainable and eco-friendly alternatives to ‘security seals’ that could be used in the project to attach the products to the packaging. These were natural and sustainably sourced rubber bands or biodegradable (plastic -free) elastic bands. These could be repurposed by the consumer after the packaging has been thrown away, rather than the regular wire ties that can’t be reused indefinitely.
CHOSEN CONCEPT DESIGN ANALYSIS & AREAS FOR DEVELOPMENT
Another task I carried out on this day was working out the areas for development and refinement for my chosen packaging ideas. My approach for this began by analysing the initial prototype nets and models already created. This revealed how the fundamental idea could be improved to better the shape and functionality of the carton, these changes were also in line with my essential project brief criteria.
Once identified, the design was changed accordingly by adjusting features such as an increase in carton dimension. From this, a ‘best’ version of the net was securitized and prototyped again before being made into the ‘final’ net ready for CAD application.
PRODUCT ONE: Powder Brush
'LEAF-GLOVE CONCEPT'
Description
A Pillow-box and open-top carton that is shaped to mimic a leaf.
Areas To Improve Carton Efficiency
- Increase the height of the bottom net face.
- Decrease the width of the net to help deliver the leaf illusion and make it structurally strong enough to hang up.
- Design a card cover/insert that is shaped to fit around the brush bristles as an internal housing and for product hygiene.
- Add cut-outs for the security seal on the top part of the product. These will be in the form of either a sustainably-sourced natural rubber band or a biodegradable hair tie, both reusable after packing disposal.
- Integrate perforated opening feature on the bottom net face.
Analysis Verdict & Course of Action
Design two versions of the ‘Leaf-Glove’ with all the design changes above;
- Version One (Basic) - No pillow-box feature to simplify net design, attach top and bottom of product via security seals, and create internal housing to cover the brush bristles.
- Version Two (‘Wildcard’) – A Pillow-box base with internal housing cover for brush bristles, only one security seal positioned on product handle.
PRODUCT TWO: Nail Clippers
'FLOWER-GLOVE CONCEPT'
Description
A Pillow-box and open-top carton shaped to mimic a tulip flower.
Areas To Improve Carton Efficiency
- The overall size of the carton needs to be increased in by several millimetres (2mm - 5mm) to hold the product securely and not be scaled too small to hold.
- The top ‘flower head’ section needs to be doubled up for better hanging strength.
- The flower shaped cut-out window is perhaps too complex for packaging that needs to be made as a mass market product. Remove or change the shape to a circle.
- The product attachment holes need to be appropriately sized to accommodate the security seals and will be placed at the top and bottom because of the weight of the product.
- The amount of fold and crease features in the design is perhaps too complicated for a net that needs to be manually assembled.
- Integrate perforated opening on the bottom panel, with an overtly placed/slight pull tab for easy discovery.
Analysis Verdict & Course of Action
Design two versions of the ‘Flower-Glove’ with all the design changes above;
- Version One (Basic) - No pillow-box feature to simplify net design, remove flower shape detail on the front.
- Version Two (‘Wildcard’) – A Pillow-box base, with flower shaped cut out detail on front panel.
PRODUCT THREE: Eyelash Curlers
'TREE-GLOVE CONCEPT'
Description
A Pillow-box and open-top carton shaped to mimic a tree.
Areas To Improve Carton Efficiency
- The overall scale of the carton needs to be increased by several millimetres, especially the width (+10mm), to fully protect and compensate for the awkward shape of the product.
- Increase the coverage of the front panel to further this security.
- Design a separate or integrated ‘shelf’ that can house the rubber extras that go on the product, as these need to stay hygienic.
- Add two sets of attachment holes for the security seals, as the product will be attached at two points to maintain its security during transportation and distribution.
- Incorporate perforated opening on the back panel and make it overtly placed for ease-of-use.
- Simplify net design by removing any unnecessary fold and crease lines.
Analysis Verdict & Course of Action
Design two versions of the ‘Tree-Glove’ with all the design changes above;
- Version One (Basic) - No pillow-box feature to simplify net design.
- Version Two (Wildcard) – Keep Pillow-box base.
I enjoyed taking the time to revisit and dissect the project brief, as this led me to discover and enquire about further packaging features (security seals) that could benefit the project outcomes even more. The task reminded me of the importance of reflection and standing back from project work to avoid making decisions that could hamper your progress.
10/08/2021
After establishing areas for development in my packaging ideas during yesterday’s task, on this day I began the process of refinement via further prototyping. This consisted of the creation of a rough sketch to gage the basic dimensions, and a further refined sketch that labeled areas that would be cut and folded. These drawings were used for the final prototype models to test the concept idea and net design, with two versions for each product (established in design stage above).
The creation of two different versions of the same design was a deliberate creative choice, as I not only wanted to challenge my design thinking, but also enable these experiments to result in the best combination of a carton with equally practical and interesting design attributes. The first version followed a simplistic design, with minimal parts based on the net design of common consumer packaging. These features include easy-to-open box tabs and one opening point to access the product inside.
The second version aimed to be more experimental, through either its shape, hanging features or how the product was attached to the packaging. These designs also had more organic and visually enticing structures, which matches the emphasis of a ‘new’ carton design in the brief, but at the same time equally disregards the focus on the packaging being easy to assemble.
The best features from each model were combined in the finalised and most improved version of the concept design, this increased the likelihood of producing an equally ‘fun’ but functionally sound series of packaging concepts.
PACKAGING CONCEPT REFINEMENT & PROTOTYPING
PRODUCT ONE: Powder Brush
'LEAF-GLOVE CONCEPT'
Version 1
'LEAF-GLOVE CONCEPT'
Version 2
ANALYSIS & IMPROVEMENTS
The second version was like the previous, except the bottom opening was in a pillow-box style. The overall dimensions of this carton were scaled down due to the first version being too big for the brush, yet there was still room for further deduction.
The height of the hanging feature was slightly too long, which not only wastes material but also made it rather flimsy and weak. This needed to be shortened to enhance the durability of the euro slot, as strength in this part is critical for a product that is hung up and handled excessively.
Despite this, the rest of the design was a far better example of how the shape of a net can be utilised to best ‘show-off’ a product when inside packaging, the rounded edges enhanced this interesting structure and made it comfortable to hold in the hand. The leaf-shape cut out should be made slightly smaller to avoid it being a weak point on the front of the carton.
'LEAF-GLOVE CONCEPT'
Version 3
FURTHER IMPROVEMENTS/CONSIDERATIONS
The hanging feature could be strengthened further by being doubled up by a mirrored section or via an additional material (e.g., rPET) layered behind it. The inner housing would have worked more effectively and be more durable if crease lines were added to allow it to bend with the shape of the carton.
The perforated strip on the back of the carton could be made even more obvious by increasing the size of the finger pull tab. A good point of reference would be in the dimensions of the tabs designed for the packaging found in my primary market research.
Adding score lines to the central point in the leaf shaped cut out on the front would allow it to bend slightly and prevent any tearing. Although the brush bristles are protected, there is the question whether they would need further protection, such as a thin film cover, as the card strip housing may not be acceptable in real life cosmetic packaging.
Once I had gotten the hang of drawing out the net designs on paper, this process became instantly more efficient. Prior to this project I had limited experience sketching packaging nets in such detail and is why I initially found it challenging. However, this difficulty did not remove the fun from this exercise, it was exciting to not know whether the net would work or need adjustments.
11/08/2021 - 12/08/2021
The prototype modelling process continued over these two days, with the product of focus being the nail clippers for the ‘Flower-Glove’ concept design.
PRODUCT TWO: Nail Clippers
'FLOWER-GLOVE CONCEPT'
Version 1
ANALYSIS & IMPROVEMENTS
As with the first powder brush prototype, this net for the nail clippers consisted of a basic box-base. This carton was surprisingly comfortable to hold despite its square nature and was enhanced via the flower shaped motif (hanging feature).
The cut-out holes that would serve as a place for the security attachments were in the correct position for an optimum hold of the product. However, the orientation of the blade head would change the method of attachment, as this is the heaviest point on the product and one card slot may be too weak to hold the clippers in place.
This weight of the product means that a more heavy-duty security seal, e.g., rubber bands, would need to be used to maintain the security and safety of the product.
'FLOWER-GLOVE CONCEPT'
Version 2
'FLOWER-GLOVE CONCEPT'
Version 3
FURTHER IMPROVEMENTS/CONSIDERATIONS
The width of the carton, particularly the base, needed to be increased to allow more room for the glue tab to sit in the correct position and not overlap with the perforation lines.
13/08/2021
Today’s main task consisted of the creation of the final prototype models of the project.
PRODUCT THREE: Eyelash Curlers
'TREE-GLOVE CONCEPT'
Version 1
ANALYSIS & IMPROVEMENTS
The ‘Tree-Glove’ net consisted of a basic box base and easy-to-open tabs. The tree shaped motif tied into the ‘nature’ theme within my project ‘brand’ and packaging concept ideas. This shape was also comfortable to hold, despite the bulky nature of the carton.
The position of the two attachment points was another good aspect of this design, holding the product at the flattest points for ultimate security. However, the depth of the carton was far too large, even for the considerable width and wonky shape of the eyelash curlers. This needed to be decreased by at least 10mm to prevent it moving around and putting stress on the carton material.
The height of the base panel needed to be increased by 10mm to allow enough surface area to house the extra components that come with the product. This was to be positioned on the bottom, acting as a shelf that separated the curlers from this component to keep them safe.
'TREE-GLOVE CONCEPT'
Version 2
ANALYSIS & IMPROVEMENTS
The second ‘Tree-Glove’ prototype was more experimental, with a pillow-box and open-top structure. This was fun in concept but highly unsuitable for the product’s differentiating width dimensions, even with score lines to help the carton bow, the curlers still protruded out of the open sections.
The inner shelf for the rubber components was also ineffective due to the shape of the pillow-box. Therefore, the lack of durability and security of this concept rendered it unfit to be developed further.
'TREE-GLOVE CONCEPT'
Version 3
FURTHER IMPROVEMENTS/CONSIDERATIONS
To better incorporate the inner shelf inside the carton, there needed to be an extra few millimetres (2mm) of relief space between the component and the inside surface.
This could also apply to the design of the glue tab, which needed to be cut out at the bottom to allow the inner housing and glue tab to attach properly. With the tab exposed, the structure of the carton is weakened and could come unstuck overtime. The visibility of the product could improved by applying cut-outs or removing part of the side panels to match the 'tree' shape created on the front.
PLAN OF ACTION TIMELINE (PHASE THREE & PHASE FOUR)
The other tasks carried out on this day was the creation of a ‘next-steps’ plan and timeline. I also created the PHASE TWO market research presentation report for the client meeting organised for next week. This presentation showcased the work and my progress over the past two weeks. The client’s response and feedback, combined with the finalised net designs and models, was highly beneficial during the next phase where these were brought into a digital format.
Before the CAD stage however, I was also required by the client to edit and republish the project timeline (see below for high quality image) to plan out the process for this penultimate and critical stage of the project. This specific calendar and timeline helped to maintain the flow of the project right until the end.
PLAN OF ACTION (PHASE THREE & PHASE FOUR)
- Client feedback/respond.
- PHASE 3 Timeline.
- Final prototypes, sketches, research.
- Initial CAD prototype.
- Developed and final CAD scamps.
- Send off to client.
- Project end/Wash up/Client feedback.
CONCEPT PROTOTYPE REFINEMENT VERDICT
& NEXT STEPS
This prototyping and refinement task was one of the most challenging in the project so far. The amount of time and precision required for each model, with some exceptions to the initial scamp models, was substantial for all possible issues to be revealed throughout the development of each concept idea.
Despite this extensive exploration and testing, the verdict of the final three designs still revealed some areas for additional refinement before being taken into CAD. However, there will always be another way to better create a product or carry out a process, it's about what you gain from rectifying the initial problems.
This process has enabled me to learn how to draw out nets carefully by hand, create crease and fold lines, and most importantly be able to produce functioning carton models with moving parts.
Click on the button below to view the PHASE TWO presentation report document. Just to note, the size of the document was condensed for the purposes of publishing it online, if you wish to see the full quaility version, please contact me for the original document (all references for information/images located at the end of this section).
WEEK FOUR REFLECTION
Overall, this week was full of challenges and design experiments that often required an extensive amount of time to produce effectively, from initial scamp to photographing the fully assembled carton.
Despite this fact, I have still learnt a new perspective on nets in the packaging industry and felt highly engaged by the practicality of the prototyping process. This will be the part of the design process I will now be keener to carry out in future projects.
WEEK FIVE
16/08/2021
The start of week five began with preparation for the end of PHASE TWO presentation and client video call. At this point in the project, this catch up was set to occur around this time and depended on the availability of the client. So, until this was arranged, I began PHASE 3 as planned to keep on track with the project deadline.
17/08/2021
Today’s task continued from yesterday’s initiation of the finalisation stage of the project (PHASE 3). However, before taking the chosen designs into CAD, I conducted a final series of improvements and refinements based on the problems raised at the end of PHASE 2. This extra dedication is not only best practice in a design process but can also reveal any mistakes with measurements or angles that could dramatically improve a designs functionality.
The process consisted of drawing out a rough sketch of the net with an accompanying list of adjustments, ready to be redrawn again with the corrected dimensions and fold lines. This final version of the structural packaging was modelled into prototypes using thick card, and through this exercise I was able to reveal the level of success of the net and original design idea.
FINALISED CONCEPT MODEL &
NET PROTOTYPE
'LEAF-GLOVE'
Powder Brush Packaging
REQUIRED CHANGES
Before the ‘Leaf-Glove’ could be progressed into a CAD format, there were several features in the prototype design that required changes;
‘Hanging Feature’
Incorporate a mirrored section on the top of the net to thicken the hanging feature, this will double the structural strength of the model.
Inner-Housing
Rethink the shape of the inner housing, it needs to be designed to fit inside the carton and equally serve as a holder for the bottom part of the brush. The successful design of the inner-housing shelf in the ‘Tree-Glove’ concept would be a good reference.
Perforated Opening
Increase the size/shape of the opening tab, this will make it easier for the user to locate and gage that this is how they can access the product.
Surface Features
Add score lines on the front and back panels of the net so it will bend slightly to support the curvature of the product.
STRUCTURAL NET DESIGN
The final net design consists of a pillow-box base and open-top structure, themed around the shape of a leaf. The cut-out on the front panel follows this theme, with a further leaf motif positioned below. The central crease lines added to the front and back panels provide some relief and bulge room for the curvature of the product. The product is accessed via a perforated strip on the back, this opening is hinted to the user via a tab. This has enough surface area for a strain-free pinch action to pull it all the way down to the bottom.
The product’s security is maintained via two attachments inside the carton. The first is in the form of a sustainable band, made from natural rubber or degradable elastic. This security seal would secure the top handle of the product and be removed by simply tearing the card material after opening the carton. This would leave the user with an additional item that could be repurposed (e.g, hair tie etc.) to help extend the life of the packaging beyond disposal.
The second point of security is positioned near the bottom of the product. This inner-housing has a circular opening with a diameter that prevents the brush from falling through and covers the head of the bristles to serve as a form of hygiene protection (as expected with cosmetic items).
If made commercially this concept would be made from coated recycled paperboard (FSC certified), praised for its sustainable and tear-proof qualities. The cut-out sections on the front would be covered by a rPET window for product protection and to add another visibility feature. The net would be glued together via a PVA adhesive, as this semi-permanent fixture would not affect the disposal and recyclability of the carton, an important factor in this project.
PROS & CONS DESIGN ANALYSIS TABLE
FURTHER CONSIDERATIONS
Despite improving this idea over five times, there is always another way to improve a concept in design. This exercise revealed several areas that needed attention;
Inner-Housing
Additional surface area on the housing attachment tabs (+5mm) would make them sit on the inside of the carton more efficiently. A series of fold lines could also help the housing fit to the roundness of the product. This component also needs to be decreased in height to 15mm, with some relief room. The diameter of the brush hole could also reduced by at least 2mm to increase the friction for a tighter hold on the product.
Drop Proof
After being dropped five times from a height of around 150cm, the carton suffered minimal surface and internal damage, suggesting the solid structural strength of the overall design.
Glue Tab
The section cut-out on the glue tab should allocate room for the inner housing to fit into (like a jigsaw puzzle).
'FLOWER-GLOVE'
Nail Clippers Packaging
REQUIRED CHANGES
The numerous errors with the ‘Flower-Glove’ concept were successfully addressed earlier on in the project during the prototyping stage. This is why there were minimal changes required at this point;
Carton Width
The general scale of net needed to be increased to allow for the perforated section on the back to work more efficiently and prevent it from becoming a weak point at risk of tearing.
STRUCTURAL NET DESIGN
The finalised net design of the ‘Flower-Glove’ concept consisted of a pillow-box base and open-top style structure, with functional features inspired by the shape of a tulip flower. This flower theme is also present by the motif on the front panel, as well as the two curved sections at the top that would be coloured green to mimic ‘leaves’.
The back panel holds the hanging feature and euro slot, layered up to strengthen the material at this point. This design choice was to compensate for the weight of the product, being the heaviest out of the three, and help with the cartons’ ability to remain hung up for an extended period. This part of the net also holds the packaging opening feature, functioning in a similar way to the ‘Leaf-Glove’ concept, a perforated strip that would reveal the product from inside.
The product is attached to the packaging two points, the first via a ‘reusable band’ security seal positioned at the weightiest part of the product (the blade head). It is also placed at the bottom to be concealed by the front panel and give the rest of the carton a ‘softer’ appearance. The second attachment near the top of the carton consists of a cut-out strap that is incorporated into the design of the net. This would hold the product to some extent but is more for visual appeal being made of the same card to match the rest of the packaging.
If this concept was made in a commercial setting, its main materials would be recycled coated paperboard (CRB) and rPET. The properties of CRB make it ideal for holding the weight of the nail clippers, including tear resistance and ability to deal with extensive pressure and bulging. It can also be sourced from sustainably managed forests or recycled paper pulp, these environmentally-friendly and practical attributes fit perfectly with the criteria of the project design brief.
The rPET material would be applied to the front of the net as a form of protection and shine to attract the eye of consumers. The main adhesive for this net would be PVA, as it is one of the most common choices for tabs because it allows a net to be easily pulled apart for disposal and still be mixable with card/plastic recyclables.
PROS & CONS DESIGN ANALYSIS TABLE
FURTHER CONSIDERATIONS
Despite improving this design numerous times, this exercise revealed a few more issues in the ‘Flower-Glove’ net concept;
Flower Motif
Position the flower shaped cut-out on the front further down (+20mm) to avoid it becoming a weak point (with crease lines).
Attachments
Move the top card attachment further down so more of the product's handle can be covered (4mm). This change would also prevent the product from falling out when handled, this happened during a Drop Test from 150cm.
Perforated Opening
Increase the distance of the perforation panel from the sides of the carton to create a thicker border. This would prevent it from being another weak point and risk damage to the structure of the carton, which unfortunately occurred in the Drop Test with multiple tears near the base.
Opening Tab
Position the opening tab further down and make this feature at least 10mm in height. This provides adequate room for a comfortable pinching grip (as seen in existing tabs on cosmetic products).
Product Coverage
In a commercial setting, would this concept provide sufficient coverage to meet the various standards in cosmetic product packaging? Or would a particular part of the product (e.g., the blades) require further protection?
After completing the first two out of three final prototype models and structural net concepts, my ability to produce and analyse a packaging net had improved even further from last week’s experiments (PHASE 2). This extensive development and refinement has given me adequate practice in this stage of a design process. The only challenge during this was maintaining the consistency of measurements when drawing out a net, as even with squared paper, the construction lines aren’t necessarily straight.
18/08/2021
The production of the final concept net and test models were continued on this day for the last of the three designs, the ‘Tree-Glove’.
'TREE-GLOVE'
Eyelash Curler Packaging
REQUIRED CHANGES
The ‘Tree-Glove’ net concept design still had some minor issues to change;
Inner-Housing
Consider some relief space (5mm) between the housing component and the inside surface of the carton.
Glue Tab
Add a cut-out section in the glue tab to allow room for this relief space, or alternatively decrease the size of both tabs so they can fit together in the limited space.
Visibility
Apply another view-window or split features on the side panels of the net to increase the products visibility from all angles.
STRUCTURAL NET DESIGN
The final net design for the ‘Tree-Glove’ consisted of a rectangular-base and open-top structure, with ‘tree-shaped accents along the side and top of the carton. This tree theme is continued by a corresponding cut-out on the front panel. The rectangular structure is a slightly less unique take on packaging design; however, this carton shape was the most appropriate because of the product’s complex features at varying widths and heights.
The complete coverage of this carton means there is no risk to the security of the product from moving around. To counteract this potentially ‘basic’ aspect of the concept, I added some curved accents on the side panels to allow the 'tree' to ‘flow’ across the net with a rather effective result.
As with the other designs so far, the main opening point for the product is via a perforated door on the back panel. This version was by far the best in terms of its dimensions and positioning, as there was adequate room for it to be opened without ripping the surrounding border, plus the opening tab was in the perfect position.
The bottom opening on the carton provides access to the extra components that come with the product, these are separated from the eye lash curlers via an internal housing shelf. This shelf feature is simple but rather effective, in the form of a thin card panel, and prevents these extra parts from falling out of the top of the carton. These parts also stay concealed and protected (hygiene risk), whilst the curlers sit on top of this shelf on display.
The product is attached to the packaging at two points via bands (natural/degradable rubber) which are positioned so that these security seals sit across the flattest points of the product. The need for two attachments is down to its awkward shape and likely-hood of movement inside the carton, as seen in existing eyelash curler packaging. These can be ripped out once the carton has been pulled open, leaving two bands for the user to repurpose, and encourage the reuse of perfectly functional items in a commercial context.
If sold commercially the ‘Tree-Glove’ would also be made from recycled coated paperboard (CRB) and rPET. The allocation of these materials is similar throughout my three concepts, paperboard for the main parts and rPET for the visibility and security coverage. All these decisions link back to the emphasis of project outcomes being as environmentally-friendly and structurally practical as possible.
PROS & CONS DESIGN ANALYSIS TABLE
FURTHER CONSIDERATIONS
The ‘Tree-Glove’ was one of the most functionally sound concept ideas of the project. However, the design could still be improved before the CAD stage;
Inner Housing
Perhaps the gaps either side of the inner-housing shelf could pose a risk to the security of the extra parts, as the carton is open at the top.
FINALISED CONCEPT STAGE CONCLUSION
The finalisation of my packaging ideas marked the end of the project prototyping stage. This task was enjoyable because I could see how far each idea had progressed since the initial sketches in PHASE ONE. Despite liking all of these ideas, my favourite was the ‘Flower-Glove’ design because of its take of changing the entire shape of a carton into a natural object.
This design was also the most challenging to model, with the weight of the nail clippers posing an intermittent nuisance of tearing the thin modelling card material. My solution for this was to stick two pieces of this material together to mimic the thickness (GSM) of paperboard, which worked so well that I applied this to the other test models. In contrast, the 'Leaf-Glove' and 'Tree-Glove' concepts were far easier to sketch and construct.
Together all three made up a successful and cohesive conceptual family of packaging designs that would stand out amongst other products on the market. This visibility and uniqueness also met the requirements of the design brief, as well as my material choice, which was as environmentally-friendly as packaging materials for mass-produced products can get! The next stage was to finally apply all this hard work into CAD, through the final digitised version of the concept nets.
19/08/2021
On this day I began the CAD sketching process to take my pencil net drawings into a digital format. These were drawn out in 2D, with any required changes to the design added during construction. Although this CAD stage did not require as much practical and time-consuming actions, the fact that the dimensions needed to be even more exact for the net to work when printed out, made this just as much of a challenge.
Also, drawing something by hand and via CAD software is rather different, sometimes achieving a certain shape can be tricky when using a mouse compared to a pencil. Therefore, the whole process was very beneficial for practicing and developing the skills of my specialism, especially when I was to receive feedback from real CAD technicians in industry, who could identify any issues with my technique to improve in future work.
'LEAF-GLOVE'
2D CAD MODELLING PROCESS
AutoCAD was the software of choice for the project because of my extensive use and familiarity of the application, with great tools, visualisation, presentation, and publishing abilities. These characteristics made AutoCAD the most appropriate for the level of quality and professionalism expected by the clients.
The process for the creation of the ‘Leaf-Glove’ 2D CAD net model consisted of four main stages. This included the setup of the title block sheet with the correct labelling and sizing. The A3 paper size was chosen for its high-quality publishing as a digital PDF with no risk of blurring or pixilation. The units of this drawing are the standard metric that is common in most design applications, plus my own pieces of work (e.g., sketches & card models) were scaled in millimetres, so any changes could have caused dramatic inconsistencies in the final and most important designs of the project.
The video above captures the first half of the design process, were I constructed the two main panels of the net. Despite sketching out the ‘Leaf-Glove’ numerous times in the project, I still used my rough scamps from the previous prototyping experiment. These were incredibly important as a reference for shape and dimensioning, and proved that the effort to create these some-what ‘messy’ drawings is well worth it for the future progress of a design.
These can map the history of a concept and record any specifications that could be missed whilst transferring the final version into a digital format.
The main tools used were the line, spline, off-set, mirror, and dimension tools. The most helpful was the off-set tool, this humble setting considerably increased the efficiency of the design process, with the entire net taking just under two hours to complete.
The video above depicts the final half of this task. The features on the front panel and curved ovals to form the pillow-box base shape were the only parts that required further attention to detail. The ‘fiddly’ nature of the inner housing also posed a challenge to eventually perfect. However, all this practice reminded me of how much I enjoyed 2D CAD design and that sometimes, a 2D model can be just as complicated as the creation of a 3D model.
20/08/2021
The CAD task from yesterday was continued today and saw the completion of the first CAD model for the project. Below is the finished title block sheet for the 'Leaf-Glove' net. The image is just for visual reference, view the high-quality version by clicking on the blue button!
As well as presenting the CAD drawing, the client also requested a copy of the .DWG files for the completed nets. This was after they kindly offered to print these off using their industry printing resources. I found this very exciting as this would really prove if my concept ideas had some scope in the cosmetic packaging market.
The first CAD exercise of the project surprisingly saw little challenges and was perhaps due to my recent efforts to perfect my AutoCAD skills with practice exercises. The only difficulty faced was correctly labelling the line types on the pillow-box tabs to half in blue and half in red - one section to cut and the other to fold. Although I could not find a solution to this at this point, the fundamental and concise layout on the title block page counteracted this error.
WEEK FIVE REFLECTION
This week’s events saw the most dramatic changes in the progress of the project and my own skills in CAD. All the previous prototyping and refinement had paid off with the end-product of three functional concept packaging net ideas, with the potential to be up to the standard of the current market and impress the client.
WEEK SIX
23/08/2021
On the final week, the main task was the completion of the CAD design modelling, ready to be submitted as part of my final work! The two concept designs left were the ‘Flower-Glove’ and ‘Tree-Glove’ nets, the CAD process for these was similar to the concept completed last week. However, the only difference was slight changes to my technique, after having the time to experiment and discover the tools that were the most effective to execute the desired design feature.
2D CAD MODEL
'FLOWER-GLOVE'
The creation of the final ‘Flower-Glove’ concept design consisted of four main stages, with several improvements based on the conclusions drawn in the refinement stage of the project. The first exercise was carrying out a quick reference sketch on paper to double check that the dimensions were in cohesion with the overall scale of the designated product.
The second stage was a critical component of a successful CAD drawing process, the organisation and labelling of content layers. This helps to keep all drawing components in the right category to be named and coloured accordingly, which was necessary for the multiple line types required in a structural net design. For this project the line types consisted of cut, fold, and perforation lines, as well as construction lines and dimensions which are a useful guide from the start to the end of the CAD design process.
The video above shows the third stage of the ‘Flower-Glove’ creation process, when the first half of the net, base panel, hanging, and attachment features were drawn out. This was an uncomplicated section of the 2D model, apart from the multiple attempts required to achieve the curves and pointy corners of the ‘flower-head’ shape. The main tool that had the right parameters to create this form was the polyline tool, this enabled me to freely create a custom arc that could be mirrored to avoid inconsistencies.
This difficulty in replicating complex curves was also experienced in the fourth stage of the net design. The video above shows the final part of the net, front panel, opening tabs, and the other ‘flower-head’ motif. This time I drew half of the shape first and mirrored it using a central construction line, which also saved time and kept the dimensions consistent with the rest of the net.
After looking at the pillow-box component of the sketch, I realised that my modelling method for this feature in the ‘Leaf-Glove’ concept was wildly incorrect! Therefore, an improved version of the first CAD net is also present in this section. This error was rectified through the arc tool instead of the circle tool to scale the diameter correctly, so the pillow-box faces would completely come together. See below for the final reference images and high-quality visualisations of the ‘Flower-Glove’ and improved ‘Leaf-Glove’ designs.
The challenges in today’s CAD task were highly valuable in revealing more techniques and tools of AutoCAD. I have also developed a more efficient structure for my 2D CAD modelling method and will now remember to set up layer names and types before starting a model in the future.
24/08/2021 - 25/08/2021
The main task over the next two days consisted of the completion of the final CAD model outcome, the ‘Tree-Glove’ concept! Despite being the easiest idea to design and model in 3D (card prototypes), the creation of certain features such as the tree shaped details or the dimensioning of the smaller tabs were more complicated than previously expected.
2D CAD MODEL
'TREE-GLOVE'
This 2D concept net model was constructed over a series of four steps, the first was a quick pencil rough, as part of my new and improved CAD process. This sketch was an excellent reference for laying out the first parts of the model, the base panel, tree-shaped motif, and main opening tab. These features are captured in the video below, the hardest part was drawing out the rounded curves of the ‘tree’ at the top of the net.
However, after some experimentation with all the line tools and inspired by similar features on my other model, I used a combination of the spline and mirror tool to achieve the perfect ‘tree’ shape. The video below shows the presence of this design feature within the rest of the model, especially on the side tabs, which were added to allow for better visibility of the product and so that the overall carton appears less ‘boxy’.
The final steps towards the completed model, all tricky parts out of the way, was with minimal issues. The only difficulty was working out how to create a slight relief angle on the top edges of the smaller tabs, to allow the bigger tab to stay in place and be easily pulled out. The solution was through the fillet tool, through which I added a small gap of 0.5mm either side of the tabs for a suitable amount of friction. The completed net model can be viewed in the image and PDF below!
CAD MODELLING &
DIGITAL FINALISATION CONCLUSION
After a considerably challenging and digitally creative series of CAD exercises, the final design outcomes for the project were completed! This stage of the project had brought my packaging ideas to life, as well as the ability to work on specific parts of my CAD specialism, from practical reference drawings to polishing the efficiency of my digital design process.
Out of the three final net designs, I believe the strongest is the ‘Tree-Glove’ concept because of its balance of being the simpler but equally unique net design. These characteristics are what makes the concept more in line with the original design brief, in comparison to the ‘Flower-Glove’ and ‘Leaf-Glove’ designs.
Despite the possibility that these concept nets may still require further improvement, the fact that I have applied my own software knowledge within the industry of packaging still makes the project a valuable experience. This will be excellent preparation for future employment in a similar job or department. The next step was to prepare for the final meeting with the clients to conclude the project and receive the all-important feedback.

26/07/2021 - 27/07/2021
Over the course of these two days the three design outcomes were inspected a final time to correct any previously missed errors. Next, the three models were exported as .DWG files (+.BAK file), along with the PDFs for visual reference, ready for client submission.
These file formats were decided at the beginning of the project as the most suitable for printing, which the clients also kindly offered to organise. This allowed them to view and inspect my final designs first-hand, and therefore offer direct and constructive feedback.
WEEK SIX REFLECTION
The final week of the project was full of practical and digital tasks that enhanced my existing skills in my digital media specialism. It also proved that if enough time is invested in the development and testing of a design, you can take an original idea and see it through to the end as a better functioning product.
All issues this week were minor and with further practice of AutoCAD I could rectify a mistake as I went along in the design process. This meant any future challenges were less severe because of how easily they could be identified, compared to my skills during a CAD exercise before the project.
SUMMER CLIENT PROJECT CONCLUSION
(PHASE FOUR)
Overall, the outcome of this six-week client project with Rarebreed was highly successful and enlightening in multiple ways. The first was the work produced for the project, from the visualisation sketches to the final CAD models, these represent my best quality work so far at university.
In terms of meeting the original design brief, I think that the three design ideas did match these requirements in certain areas. For example, the extent of my research into packaging design in industry and its level of importance in attracting the target audience, benefitted the development of my ideas into a series of unique net shapes. This was also the case for the proposed materials of the project, a form of responsibly sourced paperboard and recycled plastic would be the best combination to protect each product whilst meeting environmentally-friendly ethos I set out to maintain.
Collectively, the final outcomes also met the brief by being easy to manufacture and assemble to some extent. However, only the ‘Tree-Glove’ concept would potentially match these expectations because of its simplistic box design, compared to the other two pillow-box nets. This difference was deliberate because I wanted to test which one would easier to construct. Unsurprisingly, the ‘Tree-Glove’ was the least complicated to model throughout the prototyping and digital stages of the project, and therefore would be the net most suitable for mass production and commercial application.
Despite this, the other two designs were still strong contenders because of certain design features, such as the nature theme or security seal method. In fact, these could be the building blocks for further designs that could be deemed suitable for successfully protecting and promoting the products in a shop environment. In future packaging work, I will remember to consider the value of simplicity in a design. Despite the importance experimentation and innovation, practicality is more critical in the creation, production and interaction with a truly effective packaging net.
The next stage was to exchange the CAD project files and other resources with the client to conclude our collaboration. These files were submitted via email with an accompanying handover document to briefly explain what I had produced over the past six weeks. This form of communication was common during the project and CAD files could only be exchanged in this manner due to the nature of the file type. These were the main topic of discussion as well as my general progress in the final video call with the client.
The next steps beyond the project and after client feedback could be to continue this work during another packaging venture. This could be through the design of visual graphics for each concept, by modelling them in 3D and creating a series of commercial visualisations using KeyShot10. Overall, this could be an interesting way of progressing and presenting my original ideas into rendered and high-quality scenes.
See below for the handover document & final verdict of the printed CAD nets.
